Document Structure
Every HTML page you have ever visited — from Google to YouTube — is built on the same skeleton. In this chapter you will learn what that skeleton looks like and why every single part of it matters.
① Explanation
HTML stands for HyperText Markup Language. It is the language that tells a web browser what to display on a page. Think of it like the bones of a building — before you add paint (CSS) or electricity (JavaScript), you need a solid structure.
Every HTML document follows a fixed structure made up of four key parts. These are not optional — they must be present in every page you build. The browser uses this structure to parse and display your content correctly.
- <!DOCTYPE html> — Tells the browser this is a modern HTML5 document.
- <html> — The root container that wraps everything on the page.
- <head> — Contains information about the page that is not visible to the user.
- <body> — Contains everything the user actually sees on screen.
This structure is important for SEO too. Search engines like Google read your HTML file directly. A properly structured document tells Google exactly what your page is about and how to index it.
② Code Example
<html lang="en"> <head> <meta charset="UTF-8"> <meta name="viewport" content="width=device-width, initial-scale=1.0"> <title>My First Web Page</title> </head> <body> <h1>Hello, World!</h1> <p>Welcome to my first web page.</p> </body> </html>
③ Code Explanation
| Line / Tag | What it does and why it matters |
|---|---|
| <!DOCTYPE html> | This is a declaration, not a tag. It must be the very first line of every HTML file. It tells the browser to use modern HTML5 rules. Without it, browsers go into "quirks mode" and may display your page incorrectly. |
| <html lang="en"> | This is the root element — every other element lives inside it. The lang="en" attribute tells search engines and screen readers that this page is in English. This is important for accessibility and for Google to understand your content. |
| <head> | A container for information about the page. Nothing inside <head> is displayed on screen. It holds meta tags, the page title, links to stylesheets, and more. |
| <meta charset="UTF-8"> | Sets the character encoding. UTF-8 supports every character in every language — including letters, symbols, and emoji. Always include this first inside <head>. |
| <meta name="viewport"...> | Makes your page responsive on mobile devices. Without this, mobile browsers zoom out and show a tiny version of a desktop page. Always include it. |
| <title> | Sets the page title. This appears in two places: the browser tab, and as the blue clickable link in Google search results. It is one of the most important SEO elements on your page. |
| <body> | Everything the user sees goes inside here — headings, paragraphs, images, buttons, forms. The entire visible part of your page lives in <body>. |
| <h1> | The main heading of the page. Every page should have exactly one <h1>. It tells both users and Google what the page is primarily about. |
| <p> | A paragraph of text. This is the most commonly used tag for body content. Browsers automatically add spacing above and below each <p>. |
④ What You Will See
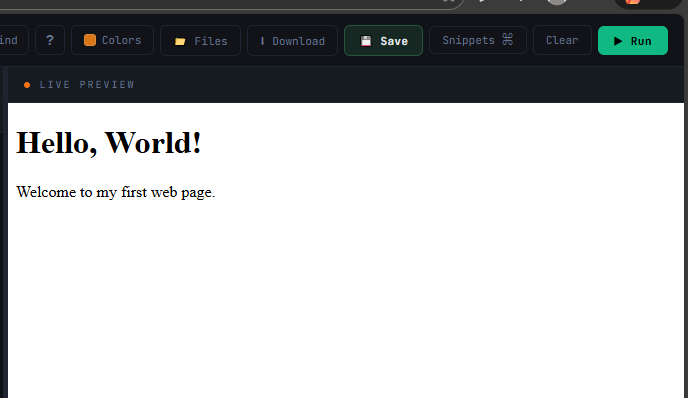
This skeleton is non-negotiable. Every professional web page starts with exactly this structure. Use it as your starting template for every project.
Head & Meta Tags
The <head> section is invisible to your visitors but it is read by every browser, search engine, and social media platform. Getting it right is what separates a professional page from an amateur one.
① Explanation
The <head> section contains metadata — information about your page rather than content on your page. Think of it as the page's "settings file".
Here is what the head controls:
- The page title — shown in the browser tab and in Google search results.
- Character encoding — ensures your text displays correctly in any language.
- Mobile responsiveness — tells mobile browsers how to scale the page.
- Linked stylesheets — connects your CSS file to the page.
- Meta descriptions — the text shown below your title in Google.
None of this appears on screen. But it all has a massive effect on how your page looks in search results, how it shares on social media, and how fast it loads.
② Code Example
<head>

  <!-- Always first: character encoding -->
  <meta charset="UTF-8">

  <!-- Mobile responsiveness -->
  <meta name="viewport" content="width=device-width, initial-scale=1.0">

  <!-- Page title: shown in browser tab and Google results -->
  <title>10 HTML Tips Every Beginner Should Know | CodeBlog</title>

  <!-- Description shown under title in Google results -->
  <meta name="description"
        content="Learn the 10 most important HTML tips that will improve your code quality, page speed, and SEO immediately.">

  <!-- Author of the page -->
  <meta name="author" content="Angel Bizuayehu">

  <!-- Tell search engines to index this page -->
  <meta name="robots" content="index, follow">

  <!-- Browser tab icon (favicon) -->
  <link rel="icon" href="favicon.ico">

  <!-- Link to your stylesheet -->
  <link rel="stylesheet" href="styles.css">

</head>
③ Code Explanation
| Tag / Attribute | What it does and why it matters |
|---|---|
| <meta charset="UTF-8"> | Always the first tag inside <head>. UTF-8 is a character encoding that supports every language in the world. Without this, special characters like accents, Arabic text, or emoji may display as broken symbols. |
| <meta name="viewport"...> | width=device-width makes the page fill the screen width of whatever device is being used. initial-scale=1.0 sets the zoom level to 100%. Without this, your page will look tiny and zoomed out on phones. |
| <title> | The page title appears in two visible places: the browser tab and the blue clickable headline in Google search results. Keep it under 60 characters for best display. Include your main keyword near the front. |
| <meta name="description"> | The text snippet shown below your title in Google search results. It does not directly affect ranking but it heavily affects whether someone clicks on your result. Write it like an advertisement for your page. Keep it between 150–160 characters. |
| <meta name="author"> | Identifies the author of the page. Google uses this as a signal for content credibility (part of its E-E-A-T quality guidelines). Small but worth including. |
| <meta name="robots"> | index, follow tells Google to include this page in search results and follow its links. Use noindex on pages you don't want in Google, like admin pages or thank-you pages. |
| <link rel="icon"> | Links to your favicon — the small icon shown in the browser tab. This is purely for branding and user experience. |
| <link rel="stylesheet"> | Loads your CSS file. Always place this in <head> so styles are applied before the page content renders. This prevents the page from flashing unstyled content. |
The <head> content is not visible to users but it is the first thing Google, Facebook, Twitter, and WhatsApp read when they process your URL. This is why getting it right matters so much.
SEO Tags
SEO (Search Engine Optimisation) is not just about writing good content. The HTML tags you use — and how you use them — directly control how Google reads, understands, and ranks your page. This chapter covers the HTML tags that matter most for SEO.
① Explanation
When Google visits your website, it reads your HTML source code like a document. It pays special attention to certain tags to figure out what the page is about. These are called SEO-critical tags.
The most important SEO tags in HTML are:
- <title> — The single most important SEO element on any page.
- <meta name="description"> — Controls what Google shows in search snippets.
- <link rel="canonical"> — Prevents duplicate content penalties.
- <h1> through <h6> — Create a readable outline that Google uses to understand your page structure.
- <img alt=""> — Describes images to Google (which cannot see images).
The good news is that writing correct, semantic HTML is 80% of SEO. You don't need special tools — you just need to understand the tags.
② Code Example
<head>
  <meta charset="UTF-8">
  <meta name="viewport" content="width=device-width, initial-scale=1.0">

  <!-- Title: primary keyword first, under 60 characters -->
  <title>Handmade Leather Bags in Koforidua | Playman's Collecion</title>

  <!-- Description: 150 characters, written like an ad -->
  <meta name="description"
        content="Shop premium handmade leather bags crafted in Kukurantumi. Free delivery in Ghana. Unique designs you won't find anywhere else.">

  <!-- Canonical: the official URL for this page -->
  <link rel="canonical" href="https://luxcraft.ng/leather-bags">

  <!-- Robots: let Google index and follow links -->
  <meta name="robots" content="index, follow">
</head>

<body>

  <!-- One H1 per page: your primary keyword -->
  <h1>Handmade Leather Bags — Made in Accra</h1>

  <!-- H2 for major sections -->
  <h2>Our Best-Selling Bags</h2>

    <!-- H3 for sub-sections -->
    <h3>The Kukurantumi Bags</h3>

    <!-- Image with descriptive alt text for SEO -->
    <img src="kk-bags.jpg"
         alt="Brown handmade leather Kukurantumi bag with brass buckle — Playmans Col."
         width="600"
         height="400">

    <!-- Descriptive link text (not "click here") -->
    <a href="/leather-bags/KK-Bags">View the Playman's Collection</a>

</body>
③ Code Explanation
| Element | What it does for SEO |
|---|---|
| <title> | The single most important SEO tag. Google uses it as the blue headline in search results. Put your most important keyword near the beginning. Keep it under 60 characters so it does not get cut off. Example format: Primary Keyword | Brand Name. |
| <meta name="description"> | This text appears below your title in Google results. It does not directly affect ranking, but a well-written description increases click-through rate — more clicks signals quality to Google. Write it like a short ad: include a benefit and a call to action. |
| <link rel="canonical"> | If your page can be accessed at multiple URLs (e.g. with/without www, or with filters), this tag tells Google which is the "real" URL. This prevents Google from treating the same page as multiple duplicate pages and splitting its ranking power. |
| <meta name="robots"> | index, follow is the default — Google can index this page and follow its links. Use noindex on pages you don't want in search results, like user account pages or search result pages. |
| <h1> | Your page's main topic heading. Use exactly one per page. Include your primary keyword here naturally. Google reads the H1 to confirm what the page is about. |
| <h2> and <h3> | Create your page's content hierarchy. H2 = major sections, H3 = sub-topics within those sections. Google uses this structure to understand the depth and organisation of your content. Never skip levels (e.g. don't jump from H1 to H3). |
| <img alt="..."> | Google cannot see images — it reads the alt attribute to understand what an image shows. Include descriptive alt text with relevant keywords on every informational image. Leave alt="" (empty) for purely decorative images. |
| Descriptive link text | The text inside <a> tags is an SEO signal. "View the Lagos Tote Collection" tells Google the linked page is about leather totes. "Click here" tells Google nothing. Always use descriptive anchor text. |
Good HTML structure IS good SEO. You do not need plugins or paid tools. Write semantic, well-structured HTML and you will be ahead of most websites by default.
Text Tags
HTML has a rich set of text tags. Each one has a specific meaning — not just a visual style. Using the right tag for the right content is what makes HTML "semantic", and semantic HTML is better for both users and search engines.
① Explanation
Many beginners use tags purely for their appearance — for example, using <b> just to make text bold. But in HTML5, tags carry meaning, not just style. The difference matters.
For example:
- <strong> means "this text is important" — screen readers will emphasise it.
- <b> just means "make this bold" — no semantic meaning at all.
- <em> means "this is emphasised, like a change of voice" — screen readers change tone.
- <i> just means "make this italic" — no semantic meaning.
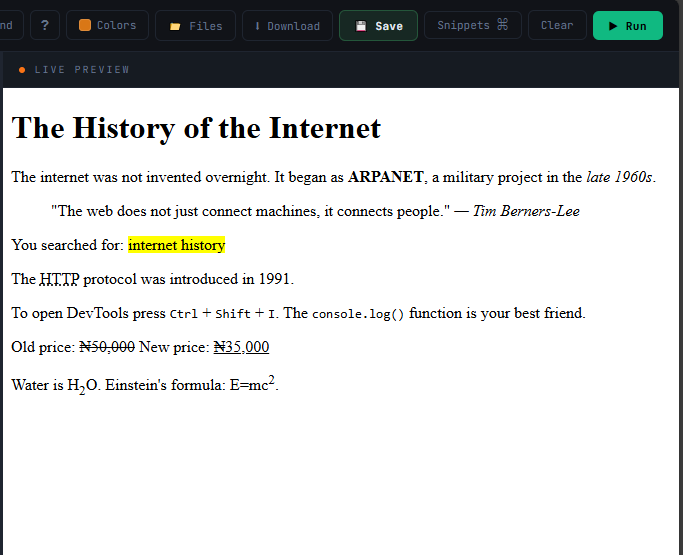
For the visual result, these pairs look identical in the browser. But for search engines and screen readers, the difference is significant. In this chapter we will build a real blog article using all the key text tags.
② Code Example
<article>

  <h1>The History of the Internet</h1>

  <p>
    The internet was not invented overnight. It began as
    <strong>ARPANET</strong>, a military project in the
    <em>late 1960s</em>.
  </p>

  <!-- Blockquote for a famous quote -->
  <blockquote cite="https://example.com/source">
    "The web does not just connect machines, it connects people."
    <cite>— Tim Berners-Lee</cite>
  </blockquote>

  <!-- Highlighted search term -->
  <p>
    You searched for: <mark>internet history</mark>
  </p>

  <!-- Abbreviation with full form on hover -->
  <p>
    The <abbr title="HyperText Transfer Protocol">HTTP</abbr>
    protocol was introduced in <time datetime="1991">1991</time>.
  </p>

  <!-- Inline code and keyboard shortcut -->
  <p>
    To open DevTools press <kbd>Ctrl</kbd> + <kbd>Shift</kbd> + <kbd>I</kbd>.
    The <code>console.log()</code> function is your best friend.
  </p>

  <!-- Strikethrough for removed content -->
  <p>
    Old price: <del>₵50,000</del>
    New price: <ins>₵35,000</ins>
  </p>

  <!-- Sub and superscript -->
  <p>
    Water is H<sub>2</sub>O.
    Einstein's formula: E=mc<sup>2</sup>.
  </p>

</article>
③ Code Explanation
| Tag | What it means and when to use it |
|---|---|
| <strong> | Marks text as important. Appears bold in the browser. Screen readers emphasise it. Use for key terms, warnings, or critical information. Do not use just to make text bold — use CSS for that. |
| <em> | Emphasises text, like a change in tone of voice. Appears italic. Screen readers change their inflection when reading it. Use for stress emphasis: "I said I was not going". |
| <blockquote> | Used for longer quotations from another source. The optional cite attribute links to the original source URL. Browsers typically indent block quotes. |
| <cite> | Credits the source of a quotation or creative work. Used inside or after a <blockquote>. Appears italic in browsers. |
| <mark> | Highlights text like a yellow marker pen. Commonly used to show search result matches within a passage of text. |
| <abbr title="..."> | Marks an abbreviation or acronym. The title attribute provides the full form, shown as a tooltip on hover. Good for accessibility and SEO. |
| <time datetime="..."> | Wraps a date or time. The datetime attribute gives machines a standardised, parseable version. Search engines use this for rich results like event listings. |
| <kbd> | Represents keyboard input. Used in documentation and tutorials to show key combinations. Typically styled with a box border. |
| <code> | Marks inline code. Uses a monospace font by default. Use for short snippets of code within a sentence. |
| <del> and <ins> | <del> shows content that has been removed (strikethrough). <ins> shows newly added content (underline). Commonly used for showing price changes or document edits. |
| <sub> and <sup> | <sub> creates subscript text (H₂O). <sup> creates superscript text (mc²). Used in scientific and mathematical content. |
④ What You Will See
Links & Media
Links are the foundation of the web — they connect pages together. Images make pages visual and engaging. In this chapter you will learn how to add both correctly, including the attributes that affect SEO, security, and performance.
① Explanation
The <a> tag (anchor) creates a hyperlink. It connects your page to other pages — on your site or on other websites. The <img> tag embeds an image into the page.
Links are one of the most important SEO elements on your page. Google uses links to:
- Discover new pages on your site.
- Understand what linked pages are about (from your anchor text).
- Decide how to distribute ranking authority across your pages.
Images also matter for SEO because Google cannot see images directly — it reads the alt attribute to understand what an image shows. A missing or poor alt attribute is a missed SEO opportunity.
② Code Example
<!-- Internal link: goes to another page on your own site -->
<a href="/about">Learn more about our team</a>

<!-- External link: opens in new tab safely -->
<a href="https://github.com/angelcode"
   target="_blank"
   rel="noopener noreferrer">
  View our GitHub portfolio
</a>

<!-- Jump link: scrolls to a section on the same page -->
<a href="#contact">Contact Us</a>

<!-- Email link -->
<a href="mailto:hello@angelbiz.net">Email us directly</a>

<!-- Phone link: tappable on mobile -->
<a href="tel:+2338012345678">Call us: 0302 234 5678</a>

<!-- ───── IMAGES ───── -->

<!-- Basic image with required alt text -->
<img src="product-bag.jpg"
     alt="Brown leather  bag handmade in Kukurantumi"
     width="600"
     height="400">

<!-- Lazy-loaded image (below the fold) -->
<img src="tools/images/team-photo.jpg"
     alt="The LuxCraft team working in their Koforidua studio"
     width="800"
     height="450"
     loading="lazy">

<!-- Decorative image: empty alt so screen readers skip it -->
<img src="divider-line.png" alt="">

<!-- Clickable image: wrapped in an anchor tag -->
<a href="/products/images">
  <img src="tools/images/image10.jpg"
       alt="View the Kukurantumi bags product page"
       width="300"
       height="300">
</a>
③ Code Explanation
| Attribute / Tag | What it does and why it matters |
|---|---|
| href="/about" | The href attribute is the destination URL. A path starting with / is a relative link — it goes to a page on the same website. A full URL starting with https:// goes to another website. |
| target="_blank" | Opens the link in a new browser tab. Use this for external links so the user does not leave your website. Do not use it for links within your own site — that confuses users. |
| rel="noopener noreferrer" | A security requirement whenever you use target="_blank". Without it, the opened page can access and manipulate your page via JavaScript. Always include both values. |
| href="#contact" | The # prefix creates a jump link to an element with that ID on the same page. The target element must have id="contact". Used for navigation within long pages. |
| href="mailto:..." | Opens the user's email app with the address pre-filled. A simple way to add a clickable email link without any JavaScript. |
| href="tel:..." | Makes the phone number tappable on mobile devices. When tapped, it opens the phone dialler. Use the full international format including country code. |
| alt="..." | Required on every <img> tag. Describes the image to screen readers and search engines. Should describe what the image shows, not just what it is. Good alt text includes relevant keywords naturally. |
| width and height | Always specify the width and height in pixels. This tells the browser how much space to reserve before the image loads, preventing layout shift — which is a Google ranking signal. |
| loading="lazy" | Delays loading the image until it is about to come into view. Use this on every image below the first screen of content. It significantly speeds up page load time. |
| alt="" (empty) | An empty alt attribute on decorative images tells screen readers to skip the image completely. Do not leave alt attributes out — always include them, even if empty. |
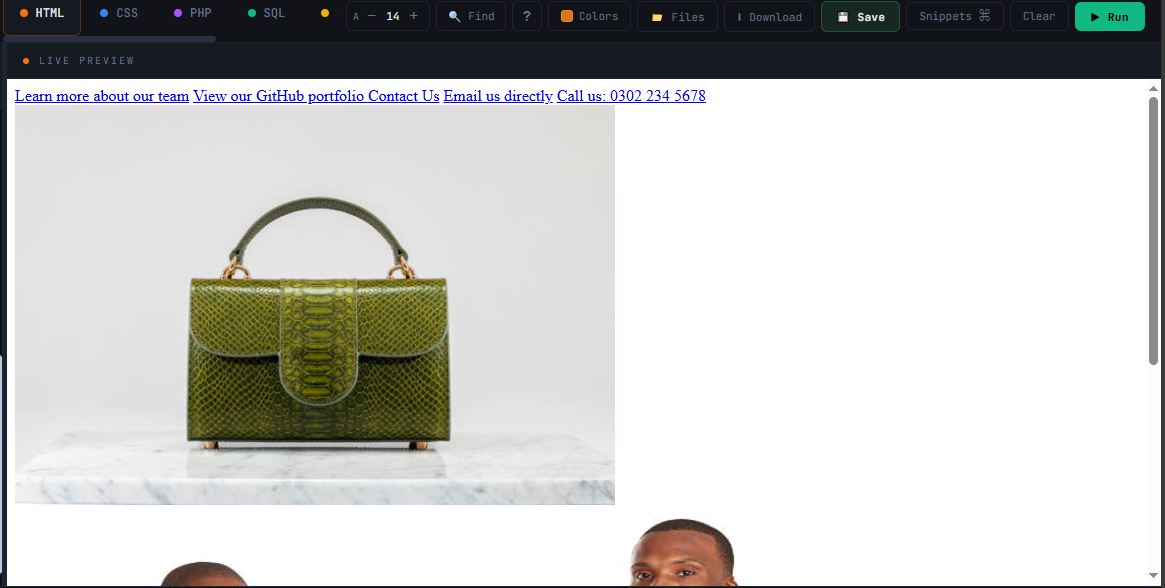
④ What You Will See
Lists & Tables
Lists and tables are two of the most useful tools for organising content. Lists are used for navigation menus, feature lists, and step-by-step guides. Tables are used for comparing data. Both have specific HTML tags designed exactly for these jobs.
① Explanation
HTML provides three types of lists:
- <ul> (Unordered List) — A list where the order does not matter. Each item gets a bullet point. Used for navigation menus, feature lists, and ingredient lists.
- <ol> (Ordered List) — A list where order matters. Each item gets a number. Used for step-by-step instructions or rankings.
- <dl> (Description List) — A list of terms and their definitions. Used for glossaries and FAQs.
Tables are used to display data in rows and columns — like a spreadsheet. They are not for page layout (CSS is used for that). Tables are for data that has a meaningful relationship between rows and columns.
② Code Example
<!-- Unordered list: navigation menu -->
<nav>
  <ul>
    <li><a href="/">Home</a></li>
    <li><a href="/courses">Courses</a></li>
    <li><a href="/about">About</a></li>
    <li><a href="/contact">Contact</a></li>
  </ul>
</nav>

<!-- Ordered list: step-by-step guide -->
<h2>How to Set Up Your First Website</h2>
<ol>
  <li>Buy a domain name from a registrar</li>
  <li>Set up web hosting</li>
  <li>Upload your HTML files via FTP</li>
  <li>Connect your domain to your hosting</li>
  <li>Test your website in a browser</li>
</ol>

<!-- Table: course price comparison -->
<table>
  <caption>Course Pricing Plans</caption>

  <thead>
    <tr>
      <th scope="col">Feature</th>
      <th scope="col">Free Plan</th>
      <th scope="col">Pro Plan</th>
    </tr>
  </thead>

  <tbody>
    <tr>
      <td>HTML & CSS Courses</td>
      <td>✓</td>
      <td>✓</td>
    </tr>
    <tr>
      <td>PHP & SQL Courses</td>
      <td>✗</td>
      <td>✓</td>
    </tr>
    <tr>
      <td>Project Reviews</td>
      <td>✗</td>
      <td>✓</td>
    </tr>
  </tbody>

  <tfoot>
    <tr>
      <td>Price</td>
      <td>Free</td>
      <td>₵5,000/mo</td>
    </tr>
  </tfoot>

</table>
③ Code Explanation
| Tag | What it does and when to use it |
|---|---|
| <ul> | Unordered list container. Items appear with bullet points. Use when order does not matter — navigation menus, feature lists, any group of related items. |
| <ol> | Ordered list container. Items appear numbered automatically. Use when order matters — steps in a recipe, numbered instructions, rankings. |
| <li> | List item. Goes inside both <ul> and <ol>. Each item should be on its own <li> tag. Can contain any HTML content including links and images. |
| <table> | The container for all table content. Tables are for data — not for layout. If you are using a table to control where things appear on screen, that is the wrong use. |
| <caption> | A visible title for the table. Placed immediately after the opening <table> tag. Important for accessibility — screen readers read it aloud before the table data. |
| <thead> | Groups the header row(s) of the table. Helps browsers and screen readers understand the table structure. The content here is the column labels. |
| <tbody> | Groups the main data rows. Separating it from <thead> and <tfoot> improves accessibility and allows browsers to scroll the body independently on long tables. |
| <tfoot> | Groups footer rows — typically totals, summaries, or pricing. Browsers will always render this at the bottom of the table even if it is coded before <tbody>. |
| <th scope="col"> | A header cell. The scope="col" attribute tells screen readers this header applies to the entire column below it. Use scope="row" for row headers. |
| <td> | A standard data cell. Goes inside <tr> (table row). Each <td> represents one cell of data. |
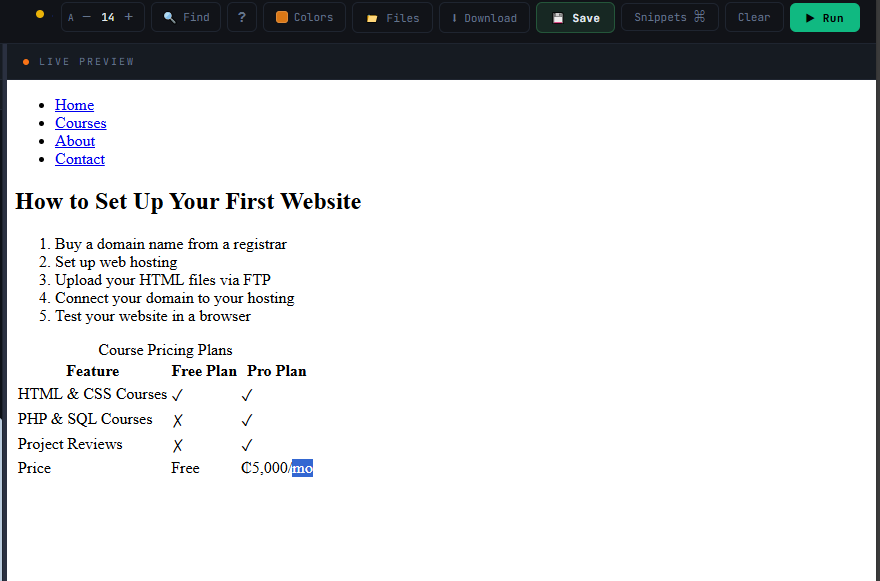
④ What You Will See
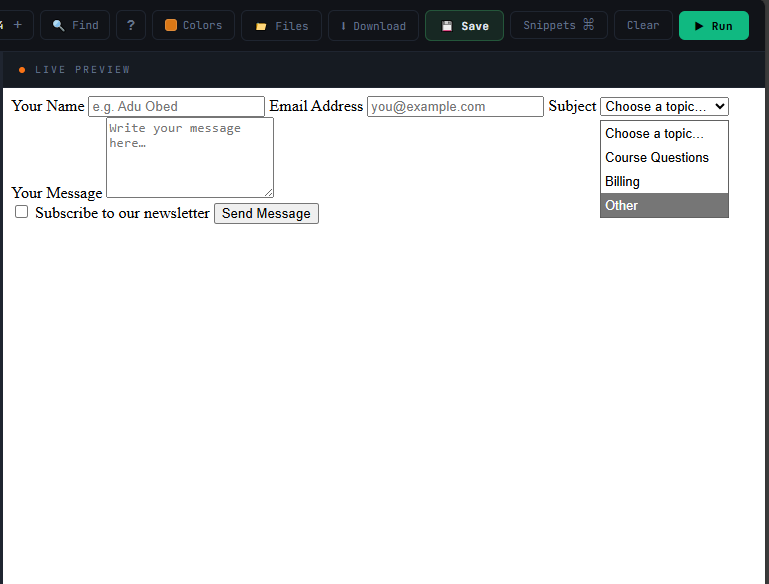
Forms
Forms are how users interact with your website — logging in, signing up, searching, sending messages. They are one of the most powerful features of HTML. In this chapter you will build a complete, accessible contact form.
① Explanation
An HTML form is a container that collects user input and sends it somewhere — usually to a server for processing. Every form has three key elements:
- Form container — the <form> tag wraps everything. It defines where data is sent and how.
- Input elements — <input>, <textarea>, <select> — these collect different types of data.
- Labels — <label> tags describe each input. Critical for accessibility.
Every input must have a corresponding label. This is not optional — without labels, screen reader users cannot understand what the input is for. It also makes the label text clickable, which focuses the input field.
② Code Example
<form action="/send-message" method="POST">

  <!-- Text input with label -->
  <label for="name">Your Name</label>
  <input type="text"
         id="name"
         name="name"
         placeholder="e.g. Adu Obed"
         required>

  <!-- Email input -->
  <label for="email">Email Address</label>
  <input type="email"
         id="email"
         name="email"
         placeholder="you@example.com"
         required>

  <!-- Dropdown select -->
  <label for="subject">Subject</label>
  <select id="subject" name="subject">
    <option value="">Choose a topic…</option>
    <option value="courses">Course Questions</option>
    <option value="billing">Billing</option>
    <option value="other">Other</option>
  </select>

  <!-- Textarea for long messages -->
  <label for="message">Your Message</label>
  <textarea id="message"
             name="message"
             rows="5"
             placeholder="Write your message here…"
             required></textarea>

  <!-- Checkbox -->
  <label>
    <input type="checkbox" name="newsletter" value="yes">
    Subscribe to our newsletter
  </label>

  <!-- Submit button -->
  <button type="submit">Send Message</button>

</form>
③ Code Explanation
| Attribute / Tag | What it does and why it matters |
|---|---|
| <form action="/..."> | The action attribute is the URL where the form data is sent when submitted. Usually a server-side script (PHP file, API endpoint). If omitted, the form submits to the current page. |
| method="POST" | Controls how data is sent. POST sends data inside the request body — invisible in the URL. Use POST for sensitive data (passwords, messages). GET appends data to the URL — use for search forms. |
| <label for="name"> | Links the label to the input with the matching id. Clicking the label focuses the input. Screen readers read the label aloud when the input is focused. Every input must have a label. |
| type="text" | A single-line text box. The browser applies basic validation based on the type. Common types: text, email, password, number, tel, date, url, search. |
| type="email" | A text input that validates email format automatically. On mobile, it shows an email-optimised keyboard with the @ symbol prominent. The browser will refuse to submit if the value does not look like an email. |
| id and name | The id links the input to its <label> via the for attribute. The name is the key used when the data arrives at the server — like a variable name. Both are required. |
| placeholder="..." | Hint text shown inside the input when it is empty. It disappears when the user starts typing. Use it for examples — not as a replacement for labels. Labels must still be present. |
| required | A boolean attribute — its presence alone makes the field required. The browser will block form submission and show an error if a required field is empty. |
| <select> and <option> | Creates a dropdown menu. <select> is the container. Each <option> is one choice. The value attribute is what gets sent to the server, the text content is what the user sees. |
| <textarea> | A multi-line text input. The rows attribute sets the visible height. Unlike <input>, it has an opening and closing tag. Do not put any content between them (it would appear as default text). |
| <button type="submit"> | The submit button. Clicking it validates the form and sends the data to the action URL. Using type="submit" explicitly is a best practice — it makes the intent clear. |
④ What You Will See
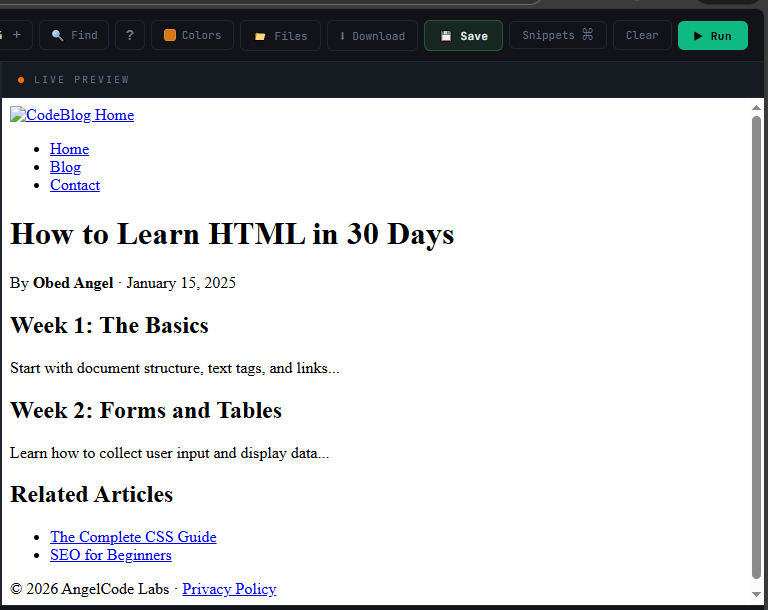
Semantic Layout
Before HTML5, developers used <div> tags with class names like "header", "footer", and "sidebar" to build page layouts. HTML5 introduced semantic elements — tags whose names describe their purpose. These make your code cleaner, more accessible, and better for SEO.
① Explanation
A semantic element is one that describes its content's meaning, not just its appearance. Compare these two:
<div class="header">— a generic box. The name is just a hint for humans.<header>— a specific HTML element that tells the browser, Google, and screen readers "this is the header section".
The semantic version is better in every way. Search engines use these elements to understand your page structure. Screen readers use them to help blind users navigate. And your code becomes easier to read and maintain.
Key semantic layout elements:
- <header> — Top of the page or section. Usually contains logo, navigation, and headline.
- <nav> — Navigation links. Can appear inside <header> or on its own.
- <main> — The primary content of the page. There should be only one per page.
- <section> — A thematic grouping of content with a heading.
- <article> — Self-contained content that could stand alone (blog post, news story, comment).
- <aside> — Related but secondary content — sidebars, ads, related links.
- <footer> — Bottom of the page or section. Copyright, links, contact info.
② Code Example
<body>

  <!-- Site header: logo + navigation -->
  <header>
    <a href="/">
      <img src="logo.png" alt="CodeBlog Home" width="150" height="40">
    </a>

    <nav aria-label="Main navigation">
      <ul>
        <li><a href="/">Home</a></li>
        <li><a href="/blog" aria-current="page">Blog</a></li>
        <li><a href="/contact">Contact</a></li>
      </ul>
    </nav>
  </header>

  <!-- Main content area: only one per page -->
  <main>

    <!-- A blog post is an article -->
    <article>
      <header>
        <!-- header can be used inside sections too -->
        <h1>How to Learn HTML in 30 Days</h1>
        <p>
          By <strong>Obed Angel</strong> ·
          <time datetime="2025-01-15">January 15, 2025</time>
        </p>
      </header>

      <section>
        <h2>Week 1: The Basics</h2>
        <p>Start with document structure, text tags, and links...</p>
      </section>

      <section>
        <h2>Week 2: Forms and Tables</h2>
        <p>Learn how to collect user input and display data...</p>
      </section>
    </article>

    <!-- Sidebar: related content -->
    <aside>
      <h2>Related Articles</h2>
      <ul>
        <li><a href="/css-guide">The Complete CSS Guide</a></li>
        <li><a href="/seo-basics">SEO for Beginners</a></li>
      </ul>
    </aside>

  </main>

  <!-- Site footer -->
  <footer>
    <p>© 2026 AngelCode Labs · <a href="/privacy">Privacy Policy</a></p>
  </footer>

</body>
③ Code Explanation
| Element | What it means and how to use it |
|---|---|
| <header> | Represents the header of a page or section. On the page level it typically contains the logo, site name, and main navigation. It can also appear inside <article> to hold the article's title and author info. A page can have more than one <header>. |
| <nav> | Marks a block of navigation links. The browser and screen readers know this is navigation, allowing users to skip to or jump between nav areas. Use aria-label if a page has multiple <nav> elements to distinguish them. |
| aria-current="page" | On the active navigation link, this attribute tells screen reader users which page they are currently on. It is the accessible equivalent of a "current" CSS class. |
| <main> | Wraps the unique, primary content of the page. There must be only one <main> per page. It excludes repeated elements like headers and footers. Screen readers have a keyboard shortcut to jump directly to <main>. |
| <article> | Self-contained content that could be extracted and understood on its own — a blog post, news article, product listing, or comment. Ask yourself: would this make sense if it appeared on a different website? If yes, use <article>. |
| <section> | A thematic grouping of content within a page or article. Each <section> should have a heading (<h2> or lower) that describes it. Do not use <section> as a generic wrapper — use <div> for that. |
| <aside> | Content that is related to the surrounding content but not essential to understanding it — sidebars, pull quotes, related links, and advertisements. Search engines treat <aside> content as secondary to the main content. |
| <footer> | The footer of a page or section. Page-level footers typically contain copyright information, legal links, and contact details. Like <header>, it can appear multiple times — once for the page, and once inside each <article>. |
④ What You Will See
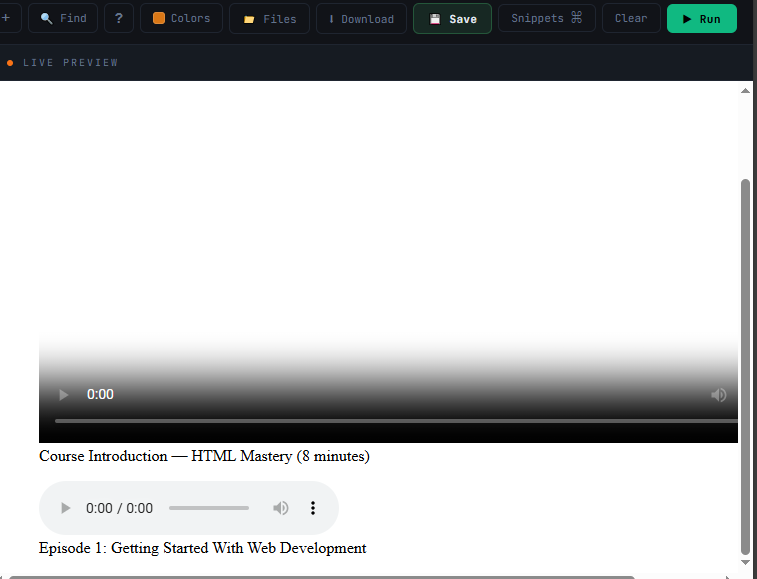
Multimedia — Audio & Video
HTML5 introduced native <video> and <audio> elements. Before these existed, websites had to use Flash Player (which no longer exists) to embed media. Today you can add video and audio to any page with just a few lines of HTML.
① Explanation
The <video> element lets you embed a video file directly in the page. The <audio> element does the same for sound files. Both give you a built-in browser player — no plugins required.
Important things to know:
- Browser support — Different browsers support different file formats. MP4 (H.264) is supported everywhere for video. MP3 and OGG are widely supported for audio.
- Multiple sources — You can provide multiple file formats using <source> tags. The browser picks the first one it supports.
- Fallback text — Text inside <video> or <audio> is shown only if the browser does not support the element at all. It is rare today but good practice to include.
- Accessibility — Videos should always have captions or subtitles for deaf users. Use the <track> element to add a subtitle file.
② Code Example
<!-- ───── VIDEO ───── -->
<figure>
  <video
    width="800"
    height="450"
    controls
    poster="course-preview-thumbnail.jpg"
    preload="metadata">

    <!-- Browser picks the first format it supports -->
    <source src="course-intro.mp4"  type="video/mp4">
    <source src="course-intro.webm" type="video/webm">

    <!-- Subtitles for accessibility -->
    <track
      kind="subtitles"
      src="subtitles-en.vtt"
      srclang="en"
      label="English"
      default>

    <!-- Fallback for very old browsers -->
    Your browser does not support video. Download it
    <a href="course-intro.mp4">here</a>.

  </video>

  <figcaption>Course Introduction — HTML Mastery (8 minutes)</figcaption>
</figure>

<!-- ───── AUDIO ───── -->
<figure>
  <audio controls preload="metadata">
    <source src="podcast-episode-1.mp3" type="audio/mpeg">
    <source src="podcast-episode-1.ogg" type="audio/ogg">
    Your browser does not support audio.
  </audio>
  <figcaption>Episode 1: Getting Started With Web Development</figcaption>
</figure>
③ Code Explanation
| Attribute / Tag | What it does and why it matters |
|---|---|
| controls | A boolean attribute. Its presence adds the browser's built-in player controls — play/pause, volume, fullscreen, progress bar. Without it, the video loads but users cannot interact with it at all (unless you build your own controls with JavaScript). |
| width and height | Set the dimensions of the video player in pixels. Always include both to prevent layout shift while the video loads. Use the same aspect ratio as your actual video (800×450 = 16:9). |
| poster="..." | A thumbnail image shown while the video is loading or before the user presses play. Without it, the browser shows a blank or black box. Use an eye-catching frame from the video or a custom thumbnail. |
| preload="metadata" | Controls how much of the video downloads when the page loads. metadata loads just the duration and dimensions — fast and efficient. auto downloads the whole video (slow). none loads nothing upfront. |
| <source src type> | Provides a specific video file for the browser. The type attribute tells the browser the file format without downloading it. Browsers skip formats they do not support and try the next <source> in order. |
| <track kind="subtitles"> | Links a WebVTT subtitle file (.vtt) to the video. The srclang sets the subtitle language. The default attribute makes this track active by default. This is essential for accessibility. |
| <figure> and <figcaption> | <figure> is a semantic container for self-contained media — images, videos, code examples. <figcaption> is the caption that describes it. Search engines associate the caption text with the media. |
| <audio controls> | Embeds an audio player. Works identically to <video> but there is no poster or size — it is just a slim playback bar. Always include controls so users can actually play the audio. |
④ What You Will See
Schema Markup & Open Graph
This chapter is about two powerful but often-overlooked HTML techniques: Schema markup makes your page eligible for rich results in Google (stars, prices, FAQ dropdowns). Open Graph controls how your page looks when shared on social media like Facebook, Twitter, and WhatsApp.
① Explanation
Schema Markup (also called structured data) is a way of labelling your content so that search engines can understand it in detail. Instead of Google guessing that "4.8 out of 5 stars" is a rating, you tell it explicitly using Schema. In return, Google can show your content as a rich result — with visible stars, prices, FAQ dropdowns, or recipe information right in the search results.
Open Graph tags control how your URL appears when shared on social media. When you paste a link into WhatsApp or Facebook, the title, description, and preview image come from Open Graph meta tags — not from your page's main content.
Both are added in the <head> section and have zero visual effect on your page — they are purely for search engines and social platforms.
② Code Example
<head>
  <meta charset="UTF-8">
  <title>How to Learn HTML in 30 Days | CodeBlog</title>

  <!-- ── Open Graph Tags ── -->
  <!-- Controls how page looks when shared on social media -->

  <meta property="og:type"        content="article">
  <meta property="og:title"       content="How to Learn HTML in 30 Days">
  <meta property="og:description"  content="A step-by-step plan for complete beginners to master HTML in one month.">
  <meta property="og:image"       content="https://codeblog.ng/images/html-30-days-preview.jpg">
  <meta property="og:url"         content="https://codeblog.ng/learn-html-30-days">
  <meta property="og:site_name"   content="CodeBlog">

  <!-- Twitter / X Card -->
  <meta name="twitter:card"        content="summary_large_image">
  <meta name="twitter:title"       content="How to Learn HTML in 30 Days">
  <meta name="twitter:description"  content="A step-by-step plan for complete beginners.">
  <meta name="twitter:image"       content="https://codeblog.ng/images/html-30-days-preview.jpg">

</head>

<!-- ── Schema Markup (JSON-LD format) ── -->
<!-- Place before </body> or inside <head> -->
<script type="application/ld+json">
{
  "@context": "https://schema.org",
  "@type": "Article",
  "headline": "How to Learn HTML in 30 Days",
  "description": "A step-by-step plan for beginners to master HTML.",
  "author": {
    "@type": "Person",
    "name": "Angel Bizuayehu"
  },
  "publisher": {
    "@type": "Organization",
    "name": "AngelCode Labs"
  },
  "datePublished": "2026-03-15",
  "image": "https://angelcode.ng/images/html-30-days-preview.jpg",
  "url": "https://angelcode.ng/learn-html-30-days"
}
</script>
③ Code Explanation
| Tag / Property | What it controls |
|---|---|
| og:type | The type of content. Common values: article (blog post), website (homepage), product (shop item). This tells Facebook and WhatsApp how to categorise the shared link. |
| og:title | The headline shown in the social media preview card. This can differ from your <title> tag — sometimes a shorter or more social-friendly title works better here. |
| og:description | The text shown below the title in the preview card. Shown on Facebook, LinkedIn, WhatsApp, iMessage, and many other platforms. Keep it under 160 characters. |
| og:image | The preview image. This is the most important Open Graph tag for engagement — a compelling image dramatically increases click rates. Use a full absolute URL (starting with https://). Recommended size: 1200 × 630 pixels. |
| og:url | The canonical URL of the page. This ensures that even if someone shares a tracking-link version of the URL, the correct URL is shown in the preview. |
| twitter:card | Chooses the Twitter preview style. summary_large_image shows a large image above the title and description. summary shows a small thumbnail alongside the text. |
| <script type="application/ld+json"> | This is the container for Schema markup. The type attribute tells the browser this is not regular JavaScript — it is structured data for search engines. The browser ignores it; Google reads it. |
| @context and @type | @context points to schema.org — the standard vocabulary. @type defines what this content is: Article, Product, Recipe, FAQ, Event, Person, Organization, etc. |
| datePublished | The publish date in ISO 8601 format (YYYY-MM-DD). Google uses this to show the date next to your result in search, and for ranking freshness signals on news and evergreen articles. |
After adding Schema markup, use Google's Rich Results Test tool (search.google.com/test/rich-results) to verify it is valid. Rich results can significantly boost your click-through rate from search.
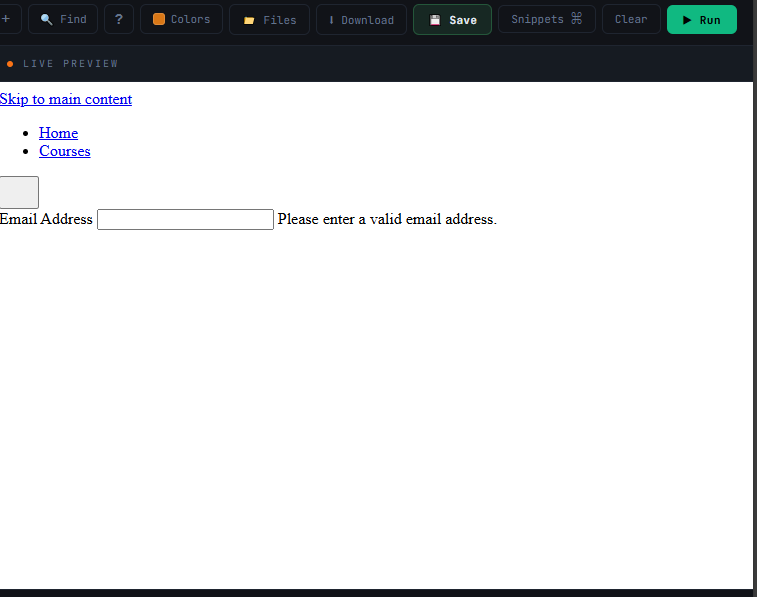
Accessibility — ARIA & Best Practices
Accessibility means building websites that everyone can use — including people who are blind, deaf, or have motor impairments. The good news is that well-written semantic HTML is already accessible by default. ARIA attributes fill the gaps for interactive elements that HTML alone cannot describe.
① Explanation
ARIA stands for Accessible Rich Internet Applications. It is a set of attributes you add to HTML elements to provide additional context to assistive technologies — primarily screen readers.
The first rule of ARIA is: do not use ARIA if semantic HTML does the job. A <button> is already accessible. A <nav> already has a landmark role. ARIA is for situations where semantic HTML is not enough — like custom dropdowns, modals, and dynamically updated content.
Key accessibility practices:
- Keyboard navigation — Every interactive element must be reachable and operable by keyboard alone (Tab, Enter, Space, Arrow keys).
- Focus management — Users must always be able to see where they are on the page (the focused element must have a visible outline).
- Skip navigation link — A hidden link at the top of the page that lets keyboard users skip directly to the main content.
- Colour contrast — Text must have sufficient contrast against its background (handled in CSS, but worth knowing).
② Code Example
<!-- Skip link: first element in body for keyboard users -->
<a href="#main-content" class="skip-link">
  Skip to main content
</a>

<!-- Accessible navigation with current page marker -->
<nav aria-label="Main navigation">
  <ul>
    <li><a href="/">Home</a></li>
    <li><a href="/courses" aria-current="page">Courses</a></li>
  </ul>
</nav>

<!-- Icon button with accessible label -->
<button
  type="button"
  aria-label="Open navigation menu"
  aria-expanded="false"
  aria-controls="nav-menu">
  <!-- The SVG icon has aria-hidden so screen readers skip it -->
  <svg aria-hidden="true" width="24" height="24">...</svg>
</button>

<!-- Accessible form field with error message -->
<div>
  <label for="email">Email Address</label>
  <input
    type="email"
    id="email"
    name="email"
    aria-invalid="true"
    aria-describedby="email-error"
    required>
  <span id="email-error" role="alert">
    Please enter a valid email address.
  </span>
</div>

<!-- Native accessible dialog (modal) -->
<dialog id="confirm-modal" aria-labelledby="modal-title">
  <h2 id="modal-title">Confirm Your Subscription</h2>
  <p>Are you sure you want to subscribe to our newsletter?</p>
  <button autofocus>Yes, Subscribe</button>
  <button>Cancel</button>
</dialog>
③ Code Explanation
| Attribute / Tag | What it does for accessibility |
|---|---|
| Skip link | The very first element inside <body>. A keyboard user pressing Tab immediately lands on it. Clicking it jumps to <main id="main-content">, skipping all navigation links. It is usually visually hidden with CSS and only appears when focused. Required on every multi-page site. |
| aria-label="..." | Provides an accessible name for an element that has no visible text label. On the <nav> example, it distinguishes "Main navigation" from a potential "Footer navigation". On the icon button, it describes what clicking the button will do — "Open navigation menu". |
| aria-current="page" | Placed on the active navigation link. Screen readers announce it as "current page". This is the accessible equivalent of adding a CSS "active" class. |
| aria-expanded="false" | Describes whether a collapsible element (dropdown, accordion, mobile menu) is open or closed. Must be updated to "true" via JavaScript when the element opens. Screen readers announce the state change. |
| aria-controls="nav-menu" | Links the button to the element it controls via ID. The screen reader communicates this relationship — "this button opens the element with id nav-menu". |
| aria-hidden="true" | Hides the element from the accessibility tree entirely. Use on decorative icons, illustrations, and SVGs that have no informational value. The icon inside a labelled button should always have aria-hidden="true" — the button's aria-label already describes the action. |
| aria-invalid="true" | Marks a form field as having an invalid value. Screen readers announce this when the user focuses the field. Should be set dynamically with JavaScript after validation runs. |
| aria-describedby="..." | Points to the ID of an element that provides additional description — typically an error message or help text. Screen readers read this element's content after reading the input's label. |
| role="alert" | Tells screen readers to immediately announce the element's content as soon as it appears or changes — without the user needing to focus it. Perfect for error messages and success notifications. |
| <dialog> | The native HTML modal element. It handles focus trapping, keyboard navigation (Escape to close), and ARIA roles automatically. Use this over custom div-based modals whenever possible. The autofocus attribute on the first button focuses it when the dialog opens. |
④ What You Will See
HTML Best Practices & Optimisation
You have now learned all the key HTML elements. This final chapter brings everything together with best practices that separate good code from great code. These habits will make your pages faster, cleaner, more maintainable, and better ranked in search engines.
① Explanation
Writing valid HTML is not enough. Professional developers follow a set of practices that improve the quality of their code beyond just "it works". These practices affect:
- Page speed — How quickly the browser renders your page. Google uses page speed as a ranking signal.
- Code readability — How easy it is for you or a colleague to read and update the code later.
- Maintainability — How easy it is to change or add to the page without breaking other things.
- SEO performance — Correct HTML structure, image optimisation, and script loading strategy all affect SEO.
- Accessibility — All the habits from Chapter 11, applied consistently.
Think of these practices as the professional standard. When you follow them from the beginning of every project, you never need to go back and "fix" your code later.
② Code Example
<html lang="en"> <head> <!-- 1. Character encoding: always first --> <meta charset="UTF-8"> <meta name="viewport" content="width=device-width, initial-scale=1.0"> <!-- 2. SEO tags --> <title>Web Dev Courses in Nigeria | AngelCode Labs</title> <meta name="description" content="Learn HTML, CSS, JavaScript, PHP and SQL..."> <link rel="canonical" href="https://angelbiz.net/web-courses"> <!-- 3. Preconnect to external domains: faster font loading --> <link rel="preconnect" href="https://fonts.googleapis.com"> <!-- 4. CSS in head: prevents flash of unstyled content --> <link rel="stylesheet" href="styles.css"> <!-- 5. JavaScript: deferred so it does not block rendering --> <script src="app.js" defer></script> </head> <body> <!-- 6. Skip navigation link: first focusable element --> <a href="#main-content" class="skip-link">Skip to main content</a> <header> <nav aria-label="Main navigation"> <!-- 7. Meaningful link text: not "click here" --> <a href="/courses">View All Courses</a> </nav> </header> <main id="main-content"> <!-- 8. One H1 per page, with your primary keyword --> <h1>Web Development Courses in Nigeria</h1> <!-- 9. Hero image: width + height prevent layout shift --> <img src="hero.webp" alt="Students learning web development on laptops in Lagos" width="1200" height="600" <!-- No loading="lazy" on hero image: it is above the fold --> > <!-- 10. Below-fold images: always lazy-load --> <img src="course-html.webp" alt="HTML & SEO Mastery course thumbnail" width="400" height="250" loading="lazy" > </main> <footer> <p>© 2025 AngelCode Labs</p> </footer> </body> </html>
③ Code Explanation
| Best Practice | Why it matters and how to apply it |
|---|---|
| lang="en" on <html> | Always set the page language. It is required for screen readers to use the correct speech voice. It is used by Google Translate to detect the original language. And it is one of the easiest accessibility wins — one attribute, massive benefit. |
| Charset first in <head> | The charset must be declared before any content to prevent the browser from misinterpreting characters. If you have a <title> before the charset, some browsers may render it with wrong encoding. |
| rel="preconnect" | Tells the browser to open a connection to a third-party domain early — before the browser has found a resource to request from it. This saves 100–500ms on external font and script loading. Use it for Google Fonts, analytics providers, and any CDN. |
| CSS in <head> | Stylesheets must load before the page content renders. If you place a <link rel="stylesheet"> at the bottom of the page, the user briefly sees unstyled HTML. Always put CSS in <head>. |
| script defer | The defer attribute loads the JavaScript file in the background while the HTML continues parsing, then executes the script after the DOM is complete. This prevents scripts from blocking page rendering. Always use defer (or async for analytics scripts that do not need the DOM). |
| Skip link | As covered in Chapter 11 — this must be the first focusable element on every page. Without it, keyboard users must Tab through every navigation link on every page before reaching the content. |
| Meaningful link text | "View All Courses" tells Google what the linked page contains. "Click here" provides zero information. Always use descriptive anchor text — it is both an SEO and accessibility requirement. |
| One H1 per page | A page with zero H1s confuses search engines about the page's topic. A page with two H1s dilutes the signal. One H1, clearly describing the page topic, placed near the top of the body, is the rule. |
| Width and height on images | Specifying these in HTML (not CSS) allows the browser to reserve the correct space before the image downloads. Without them, the page "jumps" as images load — called Cumulative Layout Shift (CLS), which Google measures as a ranking factor. |
| No lazy load on hero image | The hero image is in the viewport immediately — it should start downloading right away. Applying loading="lazy" to it would actually delay it. Only use lazy loading on images that are below the visible screen area. |
| WebP image format | WebP files are typically 25–35% smaller than JPEG at the same quality level. Use WebP for all images on modern sites. For maximum compatibility, pair with a JPEG fallback inside a <picture> element. |
| Validate your HTML | Use the W3C validator (validator.w3.org) to check your HTML for errors. Invalid HTML can cause unexpected rendering behaviour across different browsers. Professional developers validate before launching. |
④ What You Will See
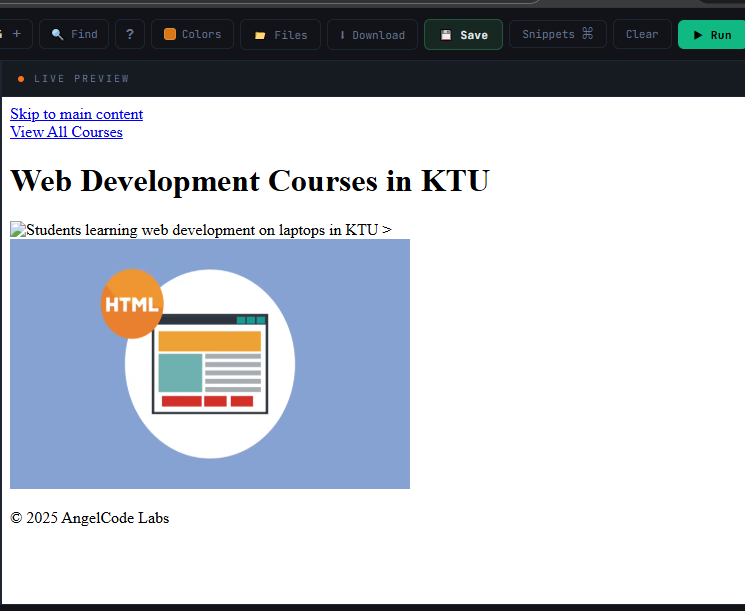
You have now learned every fundamental HTML concept — from the very first <!DOCTYPE html> to advanced accessibility and performance optimisation. The next step is practice: open the playground and build a real page using everything from this course.
DOCTYPE, html, head, body — the non-negotiable skeleton of every page.
Title, meta description, canonical, headings, alt text, structured data.
Text tags, lists, tables, forms, links, images, audio, and video.
Semantic HTML, ARIA attributes, skip links, keyboard navigation, labels.
Defer scripts, lazy images, width/height on media, preconnect, WebP.
header, nav, main, section, article, aside, footer — semantic page structure.